Support
Air tool supportOperating FRL Unit
Prepare the items below before installing and operating the FRL unit:
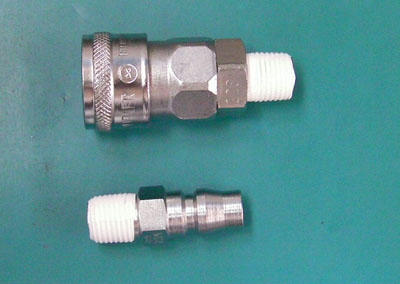
Inlet fitting (1/4" male plug)
Outlet fitting (1/4" female socket)
Thread seal tape (already wrapped around the threads in the photo above)
Structure
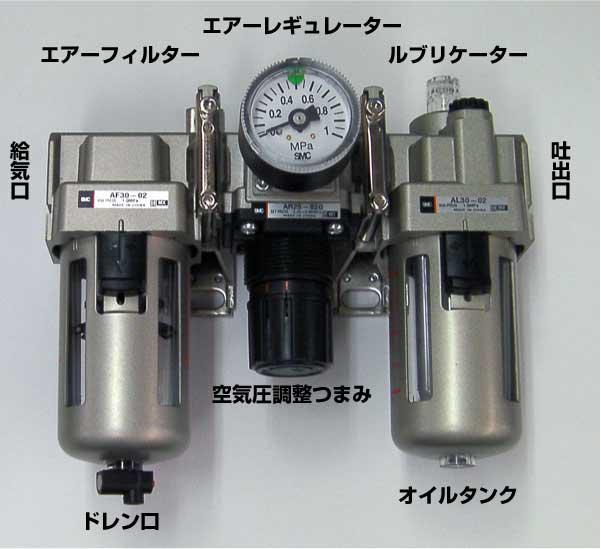
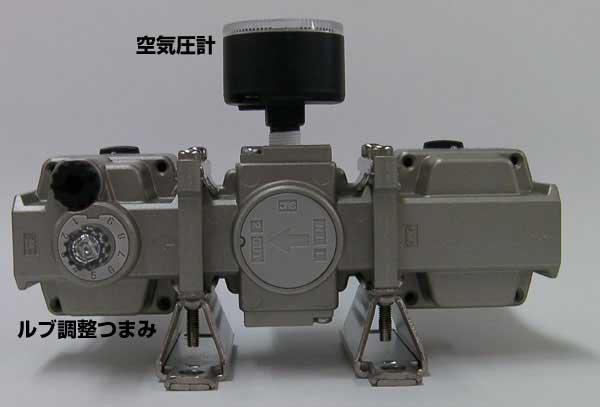
Assembly
Screw the pressure gauge into the 1/8" port on the front of the unit.
No seal tape is required as a sealant is already applied on the threads of the pressure gauge.
Tighten it fully by hand and secure at the right orientation.
Connect the fitting to the inlet port.
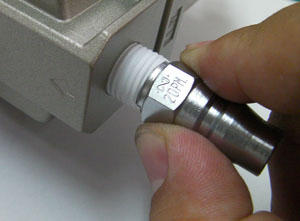
The picture above shows Nitto Kohki's Hi Cupla plug 20PM connected to the inlet port.
Wrap seal tape around the threads of the fitting.
Connect the fitting to the outlet port.
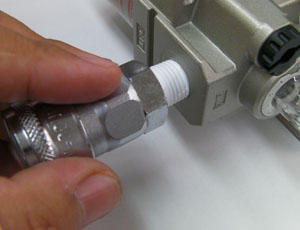
The picture above shows Nitto Kohki's Hi Cupla socket 20SM connected to the outlet port.
Using the Hi Cupla fittings with the Quick Joint is recommended as they are compatible.
Wrap seal tape around the threads of the fitting.
Filling the lubricant
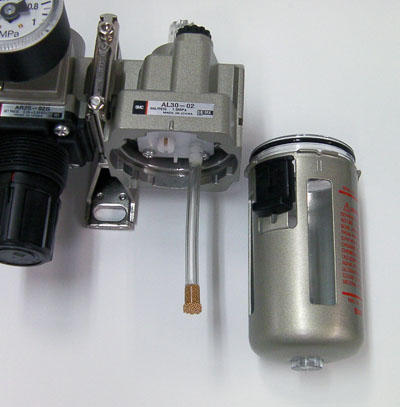
Use ISO VG 32 turbine oil for the lubricator.
Disconnect the air supply.
First, remove the oil bowl and fill oil below the maximum level.
With pulling the stopper down, turn the oil bowl to either side to remove it.
Re-assemble the oil bowl to the unit and re-connect the air supply.
Pour oil in the same way or through the unscrewed lubricant hole from the next time.
Setting the lubricator
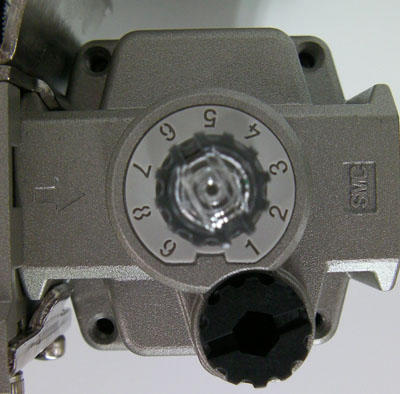
Ensure the oil amount is enough in the bowl.
With the lubricator being pressurized (by, for example, keeping the connected grinder or air blower on),
turn the transparent knob at the top of the lubricator to adjust the oil drops to your requirement.
The oil drops inside the transparent knob.
The more frequently the oil drops, the larger the oil flow becomes.
If the knob is too tight to turn by hand, use a coin or similar object to turn it.
When you set the amount of oil drops for the first time,
turn this knob fully to the right, and then turn the knob left to adjust the oil amount.
Four to eight drops per minute are recommended.
Setting the regulator
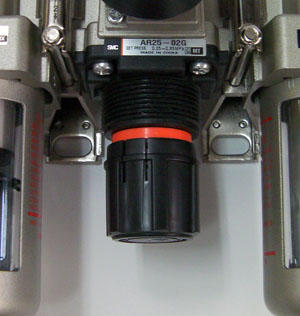
Pull down the regulating knob to unlock it until the orange ring is visible for 2 mm.
With the regulator being pressurized (by, for example, keeping the connected grinder or air blower on),
turn the regulating knob to adjust the pressure to your requirement while monitoring the pressure gauge.
To increase the pressure, turn the knob clockwise. To decrease the pressure, turn the knob counterclockwise.
The pressure range between 0.4 MPa and 0.6 MPa is recommended for UHT grinders.
When the adjustment is complete, push up the regulating knob to lock it.
Draining the air filter
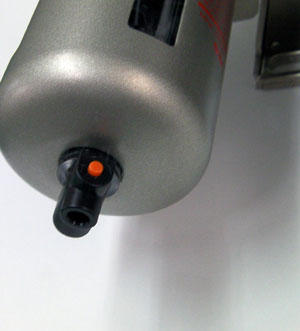
With the filter being pressurized, press the orange button on the bottom of the filter bowl to discharge the water inside.
The water is discharged with compressed air. Cover the drain port with dry cloth.
If necessary, clean the filter bowl: Disconnect the air supply, pull the stopper down, and turn the bowl to either side to remove it. After cleaning, assemble the bowl back in place.
Caution
- Maximum pressure: 1.0 MPa, maximum temperature: 60 degrees Celsius
- Never let the drain level exceed its maximum limit.
- Never let the oil level exceed its maximum limit.
- Oil of ISO VG32 is recommended.
- Never open the oil supply port of the lubricator while it is connected to the air supply.
- Make sure to connect the unit in the correct airflow direction which is shown by the arrow on the top of the regulator.
- Install the unit horizontally.
Air tool support
Industrial processing equipment support
Contact Us
- Inquiries about products
Request catalog here 
- Reception time:9:00~18:00(Weekday)